


Words, Photo, and Video from Luc Mehl
A longtime friend of Hyperlite Mountain Gear, Luc Mehl is not only one of the most creative and accomplished adventurers we know, but he's also one of the most studious and, as a result, conscientious and safe ones out there too. With a focus that's equal parts what could go right and what could go wrong, he can confidently and freely explore some of the most epic backcountry terrain, and he's got the stories to prove it! In this post, he introduces us to Wild Ice Skating–"wild" being the perfect way to describe this unique pursuit.

HMG: WHAT IS “WILD ICE SKATING?”
“Wild ice” skating refers to skating on outdoor ice. There is a very slight distinction between “wild ice” and “nordic” skating. Nordic skating has been well-established in northern Europe for centuries and involves a skate blade that attaches to ski boots. “Wild ice” skaters include folks on figure and hockey skates.
HMG: BASED ON YOUR SOCIAL MEDIA FEED, YOU SEEM OBSESSED. WHAT IS SO AMAZING ABOUT WILD ICE SKATING?
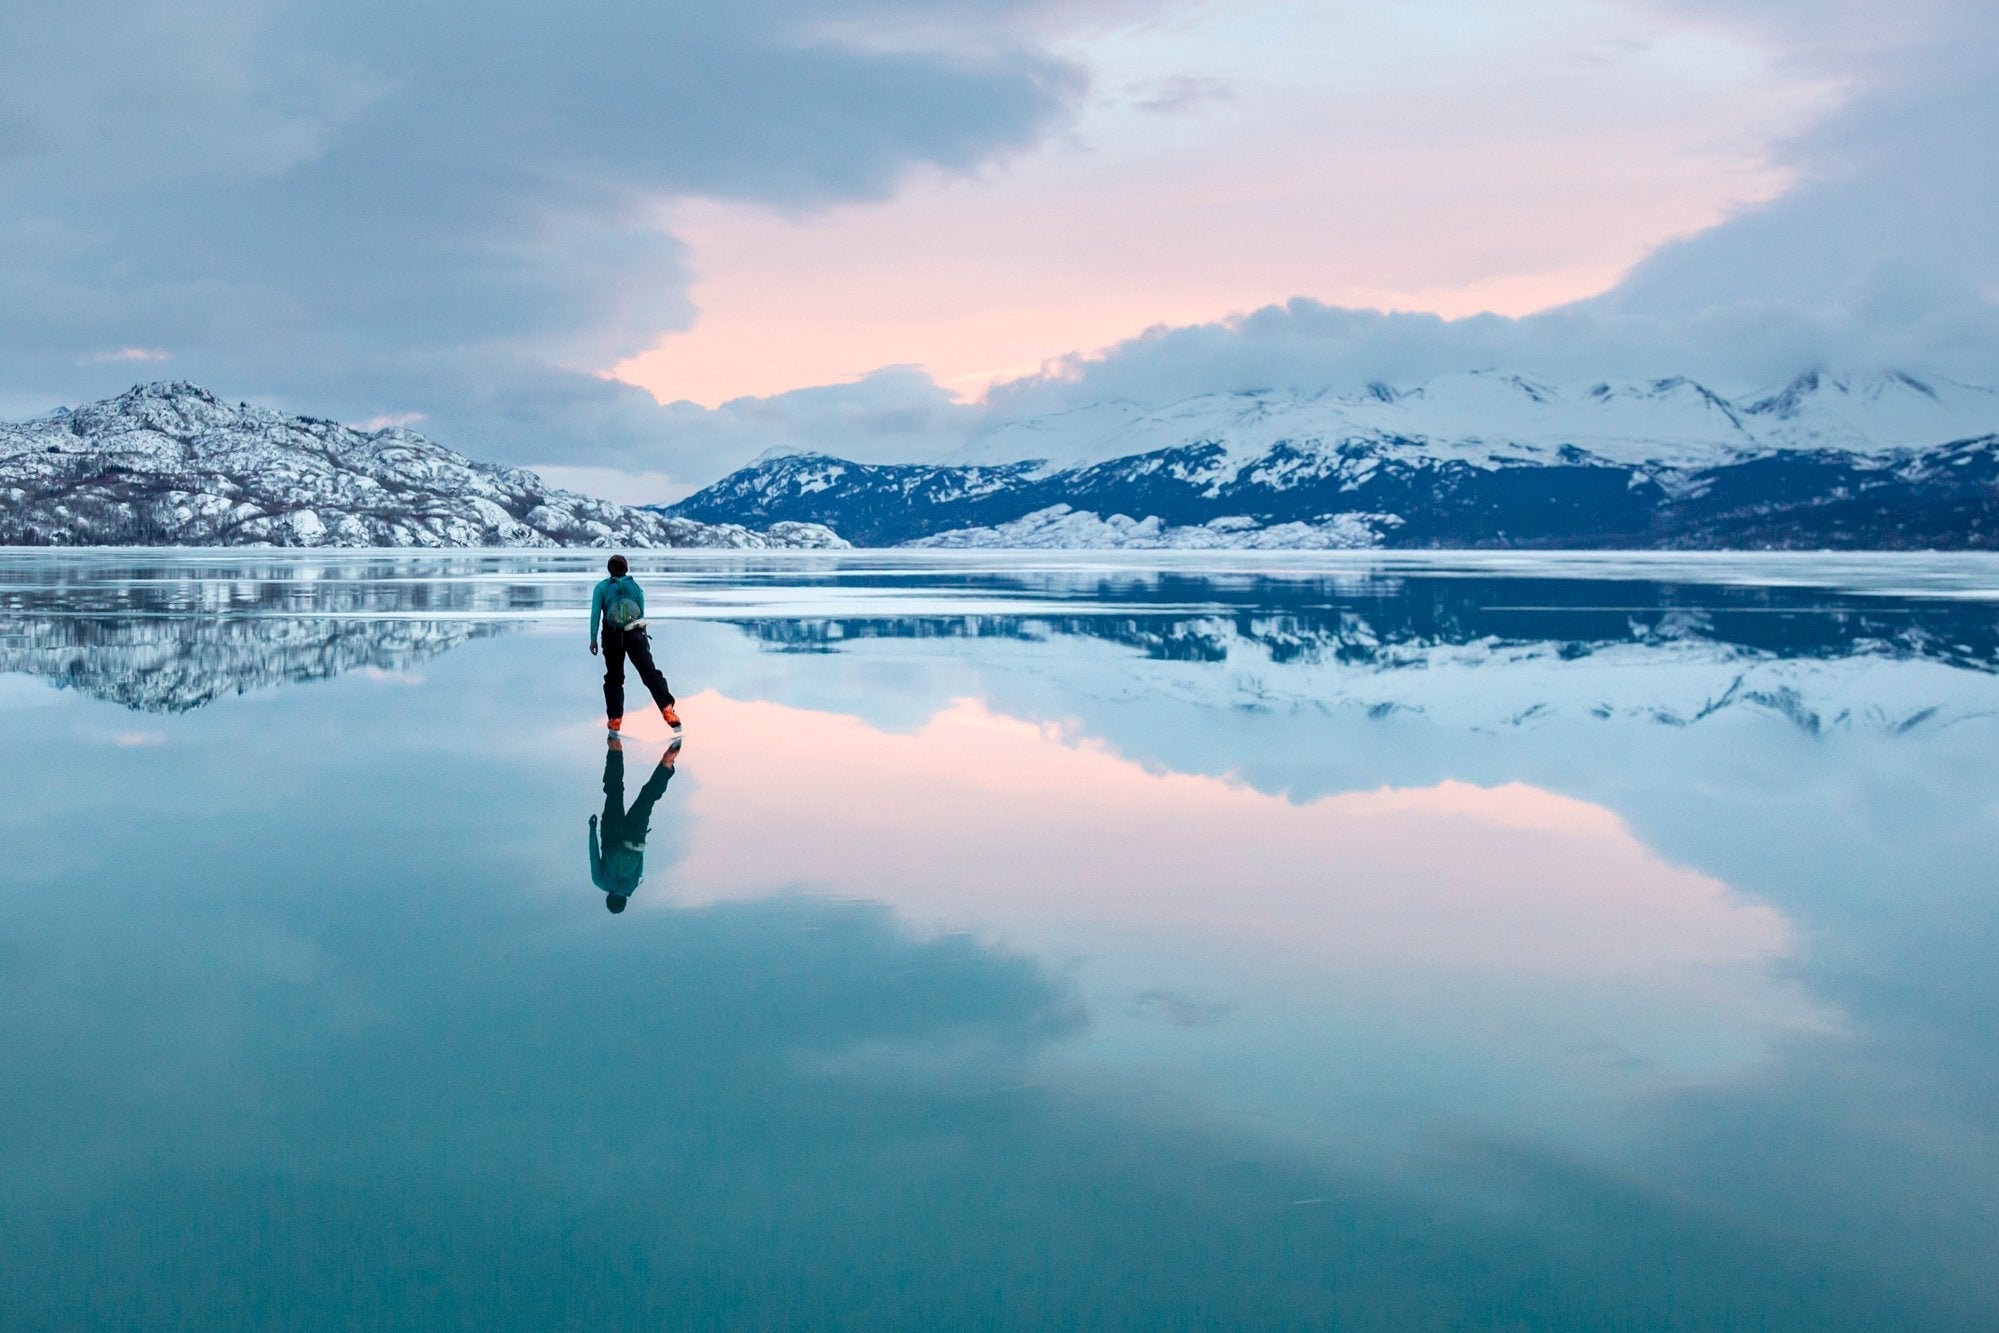
The easy answer is that it is a blast. As the HMG community can relate, I always strive for efficiency during my outdoor pursuits—skating is literally the lowest friction travel we can do. My wife, Sarah Histand, and I once skated over 50 miles in a half-day, pushed along by a tailwind. We took our breaks standing side-by-side and passing a thermos between us while we were gliding. It doesn’t get any better than that.

I also appreciate that wild ice skating brings me to places that I wouldn’t visit otherwise: marshes, ponds, etc. I’ve always been drawn to the mountains, but ice provides a new world of discovery with its own textures, sounds, and hazards.
HMG: I’M SOLD! WHAT’S THE BEST WAY TO GET STARTED?
At the most basic level, all you need are a pair of ice skates. If you already have figure or hockey skates, you can use those. But figure and hockey skates are uncomfortable during long days outside—cold, tight, and inefficient. A lot of the skating I do involves portaging (e.g, canoe trail systems), and it can be a pain to switch between shoes and skates throughout the day.
Nordic skates, on the other hand, are designed with efficiency and distance in mind. The blade is longer and flatter than hockey or figure skates, which helps to smooth rough ice and makes striding more efficient. The skates are mounted with ski bindings and worn with ski boots, which many people find to be more comfortable and warmer than dedicated skates. Skate ski boots are the most popular because they have added ankle support and a rubber bumper that helps snap the heel back to the skate. I actually wear my backcountry ski boots. Backcountry boots are a heavier option, but I get better ankle support, insulation, and traction when walking.

If you already have basic winter clothing and ski boots, you can find nordic skates and bindings for ~$250. That’s a pretty low entry bar for a new sport.
HMG: OKAY, I’VE GOT SKATES AND I SHOW UP AT THE LAKE. WHAT DO I NEED TO KNOW ABOUT SAFETY?
In terms of what actually goes wrong … most incidents on ice are bruises and broken bones due to impact. Knee and elbow pads are a good idea, as is a helmet. Wrist braces are a good addition for folks that anticipate a lot of falling or with known low bone density.
The other thing that goes wrong is that people break through the ice. This typically happens early in the freezing process while the ice is thin, or late in the season when absorbed solar radiation weakens the ice.

I think it is helpful to distinguish destinations as known or unknown entities. Known destinations include ponds and lakes that are monitored by municipalities or other organizations. Once the ice is four inches thick (10 cm), there is a wide margin of safety for groups of skaters—you can probably just show up and have a great skate.
Unknown entities should be skated with additional safety equipment and training. The big difference is that you might encounter thin ice and cold water immersion. You will want to evaluate the ice’s strength throughout the day and know how to rescue yourself or help others
HMG: HOW DO YOU EVALUATE THE ICE’S STRENGTH?
The best way to monitor the ice’s strength is to carry a pole with a heavy steel tip. Ice fishers call these poles ‘spuds’ or ice chisels. The ice pole that I use is a lighter option specifically designed for nordic skaters, but it is basically just a ski pole with a beefy tip (total weight is about one pound). By jabbing at the ice I can effectively measure how much force it can support. For example, two hard jabs from my elbow tell me if the ice will support my weight or not. Different poles and people have different calibrations.

Measuring the ice’s thickness is also very useful. There are caveats, e.g., black congelation ice is stronger than white snow ice (saturated snow that turned to ice), but, especially in the early ice season, thickness is a good proxy for strength. At least four inches (10 cm) is what most managers want because it offers a wide margin of safety. Two inches (5 cm) is enough to support your weight, but if you find a pocket with thinner ice, you could break through.
I measure the thickness by chipping away at the ice with my pole or using an ice screw. I’m not very exact about it … I mostly keep the four-inch and two-inch thresholds in mind. I’m on alert at two inches and I get to relax a bit at four inches.
Thickness is not as useful for evaluating strength during the thaw season when the ice loses its structural integrity due to solar radiation. Most ice incidents occur in the spring for this reason. Several cycles of daily melting and nightly freezing can produce an unreliable ice cover that might be strong in the morning but rapidly weaken in the afternoon.

Other ways to infer strength include listening to the ice—low pitches indicate thicker ice—and loading it with your body weight. If your weight generates cracks, then you are at risk of breaking through. Some communities throw rocks high in the air to listen to the thud of impact and look for cracks. This isn’t a practical solution to me … you just can’t do it often enough to get the information you need (keyword: efficiency!).
HMG: CAN WE TALK MORE ABOUT CRACKS? ARE ALL CRACKS BAD?

Not all cracks are worrisome. Ice typically has thousands of cracks, most of which are not visible, due to normal thermal expansion and contraction. These ‘dry cracks’ aren’t that big of a deal—the rule of thumb is that dry cracks indicate the ice is 10% weaker. But if water can flow through a crack, a ‘wet crack,’ the ice can be 50% weaker. The intersection of wet cracks is even weaker (about 75%) and should be avoided.
This typical crack progression due to a load (your weight) can help you gauge strength: The first crack is often single, long, and straight. This crack isn’t very worrisome. The next crack is expected to form perpendicular to the first, and possibly as a set of radiating cracks. These cracks indicate that you’ve reached half of the capacity of the ice (and should go back to thicker ice!). If you are moving, these radiating cracks often form as pairs shooting off to the right and left as you progress, like a zipper. The next, and final, phase of cracks are circumferential—curved cracks that connect the radiating cracks. Circumferential cracks indicate that you’ve met the capacity of the ice and are about to break through.
HMG: WHAT DO PEOPLE NEED TO KNOW ABOUT BREAKING THROUGH THE ICE?
There is a really helpful “1:10:1” principle about cold water immersion. It is just a rule of thumb, but it captures important concepts:
• One: A person in cold water has one minute to get their breathing under control. If they panic for more than one minute, they are likely to aspirate water and drown. The key is to focus on regaining control. Relaxing.
• Ten: A person has ten minutes of useful movement before cold incapacitates the limbs and causes swimming failure. The person will lose motor control of their arms and legs, making them unable to self-rescue.
• One: A person has one hour before losing consciousness due to hypothermia. After one hour, most people will become severely hypothermic, and unlikely to recover, even with medical treatment.
HMG: WALK US THROUGH THE PROCESS OF GETTING OUT OF THE WATER. ONCE YOU GET YOUR BREATHING CONTROL, WHAT NEXT?
Everyone should be wearing ice picks around their neck. Ice picks are cheap ($10) and incredibly important because they provide the traction you need to climb onto the ice shelf. Plan A is to self-rescue: Get your breathing under control (“It’s okay. I’ve got this.”). Then swim back to the ice shelf in the direction you came from—it is preferable to go back to ice that once supported you than to go forward to unknown ice. Place your arms on the shelf, lift your feet behind you to be in a normal swimming position, and use the ice picks for traction as you gently kick your way onto the ice shelf. Thin shelves can break under your load, but eventually, you should reach supportable ice. Once you are out of the water, roll away from the edge to where you can crawl and eventually walk away.